* Haitian Metal Art -Care for your Metal Art- How to Hang your art - Yes you can Bend
 CARING FOR YOUR METAL ART:
We have posted all over this website that our Haitian metal wall and garden sculptures are great for hanging indoors or out, but quite reasonably, people will ask, "Won't it rust if I hang it outside?" The fact is, these sculptures are all made of recycled steel and if they are exposed to the elements, they will eventually rust over time. Like death and taxes, rust is inevitable.
Notice I said, "they will rust over time." Our Haiti Metal Art is all clear-coated with a protective finish before they leave the workshops in Haiti. Depending on exposure, the coating won't wear off for a year or better. If it gets salt air, for instance, or frequent rain and snow, you might want to re-treat the sculpture with spray-on clear coat enamel, which you'll find readily available at any hardwarestore. (We like to use the Ace brand, but really, any will do.) Spending 5 minutes once a year to reapply a protective coating is plenty and your sculpture will retain the same look as the day you bought it, pretty much forever.
IF you don't get to your sculpture quite in time, and you find that rusting has already occurred, there is no need to fret. First of all, rust is not necessarily a terrible thing. Some people actually like a weather-worn, rusted finish. The sculpture is made of heavy-gauge steel and won't disappear to nothing if it goes untreated. You can see what you think. If you decide that you like a glossy look, take a little steel wool and lightly sand the rusted area. Dust it off, and spray, front and back. Five minutes to dry, and it will be as good as new. Honest.
 HOW TO HANG YOUR HAITIAN METAL ART:
When you hang a dozen or more metal sculptures a day, the question of how to hang them rarely creeps into our heads. But maybe this is your first metal sculpture to hang ever and it isn't so obvious to you. So here you go: Simple instructions for hanging your Haitian metal art.
Let's start by pointing out that a great number of our sculptures have a nail hole or an obvious hanger riveted onto the back. Clearly, that's where the nail goes, then. But say it is a bird, and you want to change the angle of his flight. A second small finishing nail, placed discretely underneath a wing is perfect for this.
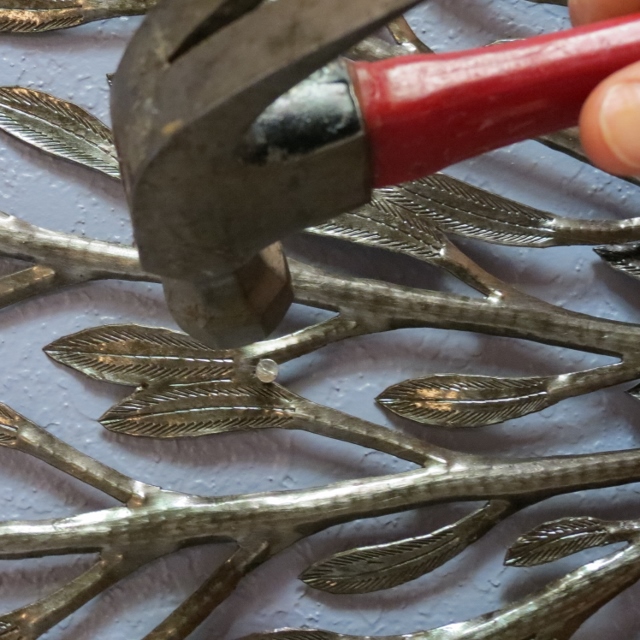
If there is no nail hole and no hanger, it is because your sculpture doesn't need one. It is still an easy job to hang it when you know the drill. First, look at the front of the piece and find the approximate middle where design elements are closed or joined, such as where two leaves meet or under an arm or petal of a flower. Holding the sculpture to the wall, bang the first nail in there. Then, find a second place where the design elements are joined. Bang the second nail in there to straighten and secure it. Repeat as necessary for larger sculptures. Generally, two nails are sufficient for 23" rounds or smaller and you'll want both nails to have small heads on them. If the nails are shiny, you might want to darken the heads with a black Sharpie marker.
The idea here is that when you step back, the nails disappear into the sculpture. This works beautifully, I kid you not. What you don't want to do is draw attention to the nails. Therefore, if the sculpture has a face, place the nails anywhere but in a nose or mouth. The viewer's eyes always go straight there and simultaneously straight to the nail, if that's where you've placed it. You don't want that!
 BEND~
BEND~
Being careful with something that is brand new, out-of-the-box wonderful is a good instinct to follow, usually. On the continuum of action between cautious and bold there are times when one should be exercised over the other. Sometimes being cautious is the right choice. But sometimes, being bold is the way to go. Such is the case with dimensional sculptures. You need to be bold to make them pop: You need to bend them to give them the dimensionality they were designed to have.
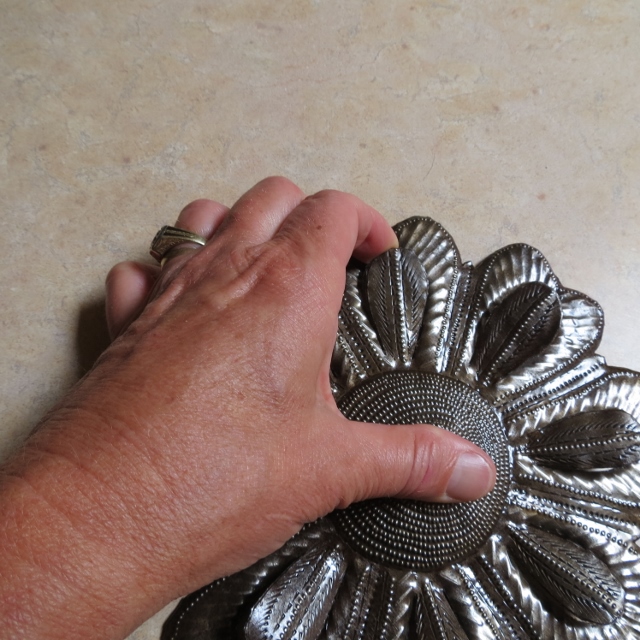
When we ship out Haitian metal, we keep everything as flat as possible. This saves space and ultimately money - both for you and for us. But the terrific thing about having a 3-D sculpture is that it actually is 3-D. SO, if there is a wing riveted onto a bird, bend it out a little. Same with bees, ladybugs, and angels' wings. If it is riveted on, it is fairly begging to be bent out. Remember how these sculptures are made: with a chisel and a HAMMER. They can take a little rough handing. If you bent it out too much, bend it back. It's okay.
Riveted attachment isn't the limiting factor to the "bend it" dictum. Think of curly tails on geckos, fins on mermaids, or dreadlocks on masks. Think about petals on flowers or wings on butterflies, or rays of a sunface. If you like the idea, give it a try. The beauty of it is that you can always change your mind, and you really CAN'T screw it up!

