
Hanging Your Haitian Metal Art Sculpture in 2 Quick Steps
It has become apparent that I have put the cart before the horse with regard to decorating with Haitian metal. I have posted numerous blogs in which I have offered lots and lots of ideas for WHERE to display our sculptures, (on the fence, on the wall, above the doorway, on the fireplace, etc.) but most of them require knowing HOW to hang them first. So let’s back up a bit and I’ll do a little show and tell.
Some of our recycled metal sculptures come with a hanger riveted to the back of the piece, making it pretty obvious how to get the job of hanging done. If it doesn’t have a hanger, it’s because it doesn’t need one. The job is still a snap and all you have to do is follow these 3 simple steps:
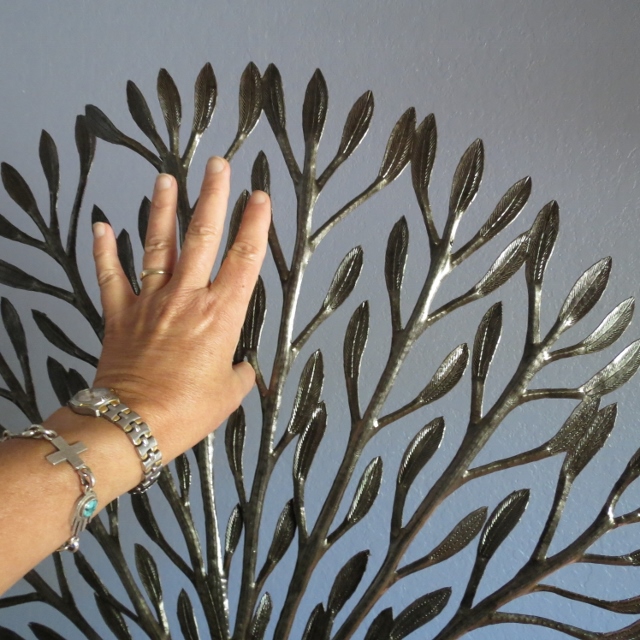
1. Looking at the front of the sculpture and find the approximate middle where design elements are joined or closed. In this tree of life, it is where two leaves meet. Hammer the first nail in there.
2. Then, find another place where design elements are joined or closed. Use this point to straighten and secure the piece. If the sculpture is large, you may want to use another nail or two, but for most sculptures (23″ round or smaller) 1-2 nails are sufficient. ” When you step back to admire your work, you’ll see that the nails have “disappeared” into the sculpture.


Pro Tip: If your sculpture has a “face” such as that of a bird or mermaid, for instance, make sure you DO NOT put the nails in the eyes or mouth. A viewer’s attention will go right to those elements and therefore, straight to your nail. That is exactly what you don’t want.
And just like that, your beautiful Haitian metal art is up! Now, didn’t I tell you? It’s a snap!